
If you use Facebook marketing then you must have Facebook pages. We have seen a lot of our users asking us how to merge two Facebook pages? This is why we want to address this in a public post to benefit the community at large.
There are occasional glitches on Facebook that may result in you getting frustrated and having multiple pages. This results in issues with Facebook audience insights reporting and management.
If you happen to have two Facebook Pages that perform the same function and exist for the same purposes, you might want to merge them together.
Why Merge Two Facebook Pages?
Some of the reasons may include:
- You created a Facebook Profile for your business, then created a Facebook Page, then turned your business Profile into a Page. Now you have two Facebook Pages.
- Your coworkers or employees created multiple fan pages of your business and now it’s confusing which one is official.
- You created a Page with the wrong name, but it gained popularity anyway. Then you created a Facebook Page with the correct name. Now you have two Facebook Pages.
- You lost your admin rights to your Facebook Page so you created a new one. Then you regained your admin rights to your old page and now you have two pages.
- Your page wasn’t listed as ‘local‘ even though it is a local business. People checked in to your business on Facebook, creating multiple auto-generated ‘local‘ pages of your business and now it’s confusing which one is official.
What are the requirements?
If you want to merge your pages then there are some requirements that you must fulfill. Here are the three primary ones.
- Be an admin of both the pages
- Both pages have similar names and represent the same thing
- Both pages have the same physical address
Make sure that you don’t have any ad campaigns currently running on the Facebook Page that you want to merge.
Any ad campaigns currently in practice will be deleted at the time of the merging of the two Facebook Pages. So make sure to take that into consideration.
Keep in mind that not all Pages will be eligible to merge according to Facebook’s policy.
According to Facebook,
“If you don’t see the option to merge your Pages, it means that your Pages aren’t eligible to be merged. If you see the option to request to merge your Pages, your request will be reviewed by Facebook.”
Now, let’s learn how to merge your Facebook Pages.
- Head over to facebook.com/pages/merge
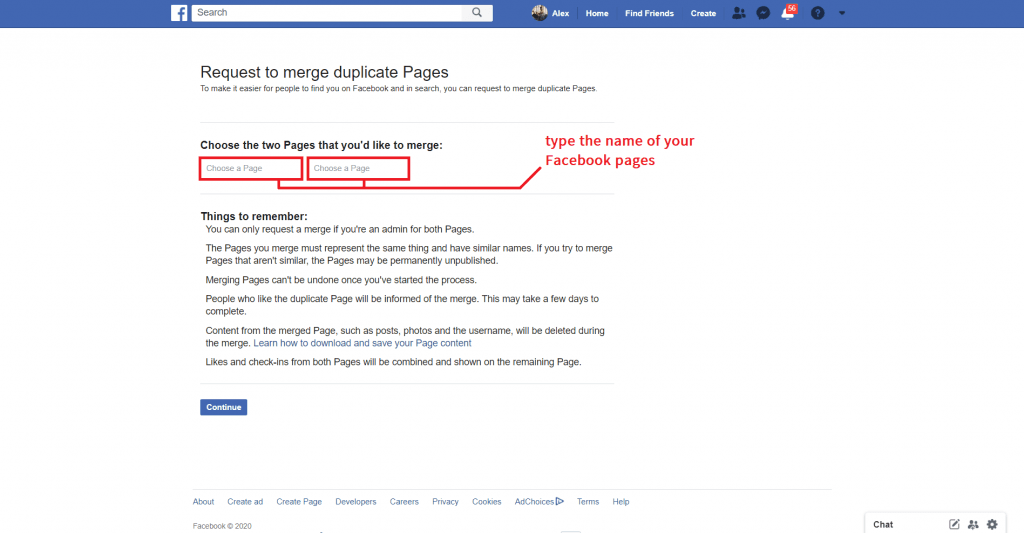
- Type down and select the names of your pages that you want to merge and hit ‘Continue‘
- Select the page you want to keep and hit ‘Keep Page‘
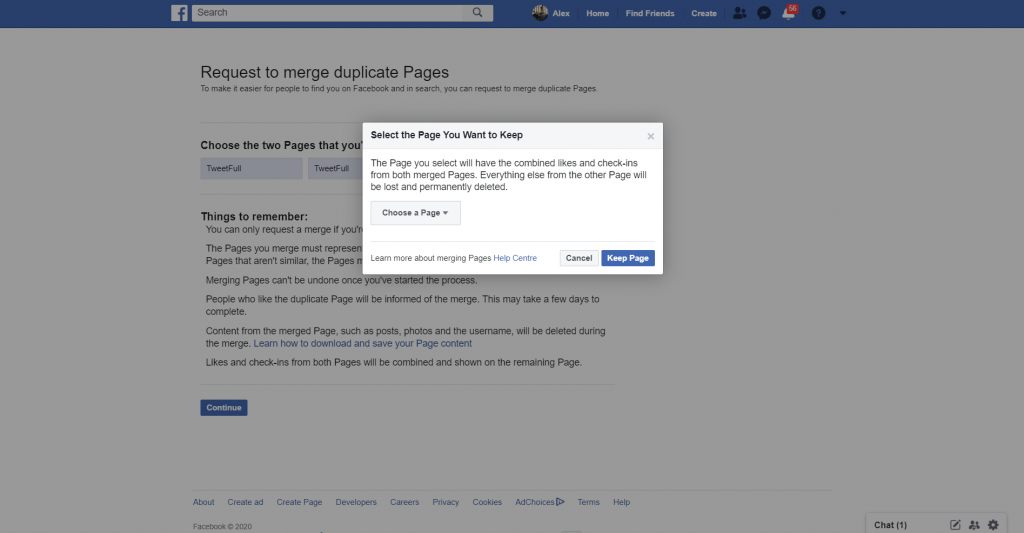
- Select the option ‘Request Merge‘
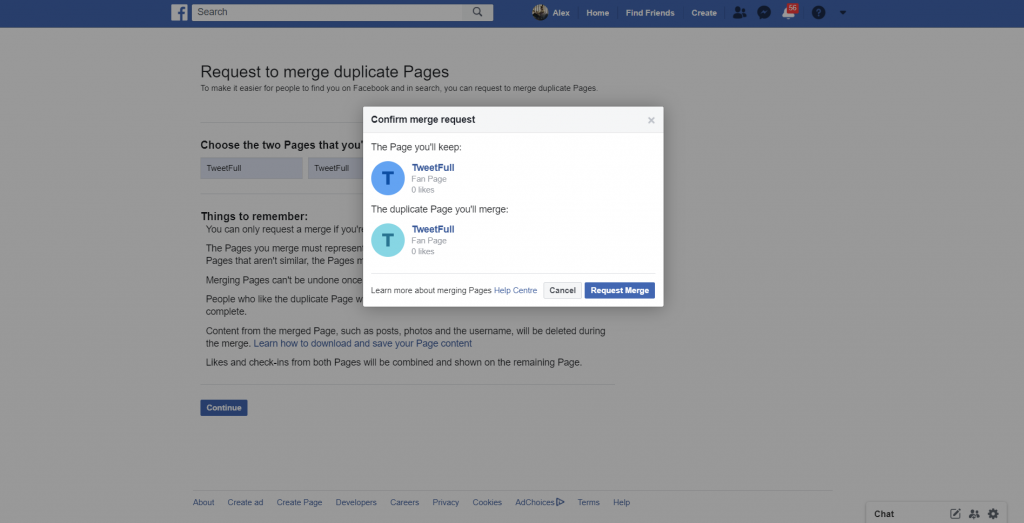
Do that and you should be good to go. Facebook will consequently delete the duplicate page.
Don’t worry though, all the information on that page transfers over to your main page as a result.
However, it is very likely that Facebook may not allow you to merge your pages and there may be several reasons for the same.
In this case, there isn’t much you can do except for reaching out to Facebook’s user support team and ask them for direct assistance.
What to do after merging your Facebook Pages
In case you successfully merge your Facebook Pages, it’s time to jazz it up a little bit and give it a sorta-new look.
To do that, we’re going to change a couple of things and also add in some new info.
Upgrade your visuals
Your profile picture and background cover image are some of the first things that people see when they search for or visit your Facebook Page.
You can use this fact to your advantage.
This is where you use decent graphic tools or graphic designers come into play. Since you now have only one official Facebook Page and it has become easier for people to find you, you’re gonna want to make sure that they stick.
Thankfully, great visuals can do half of that job for you.
Try to create and add a new profile picture and a new background image. This is a good time to get those creative juices flowing. Your profile picture usually contains your logo, so it doesn’t leave you much room for additional creativity.
But that’s certainly not the case for background images. In your new background image, you can get as creative as you want. But make sure that the image is instantly informative and lets people know what value you are trying to add in their lives via this Page.
Verify your Page
Verifying your page can give it a new identity and rank your page up higher in searches resulting in more visits to your page.
How to verify your page, you ask?
Well, the short answer is by filling THIS form.
The long answer is that in order to be verified, Facebook requires a couple of things from you:
- Authenticity: Your page must represent a real person or a registered business entity
- Unique: Your page must carry your unique presence. Facebook doesn’t verify accounts/pages that carry general interests.
- Complete: Your page must have an active presence, an about section, a profile photo, and at least one photo.
- Notable: The entity your page is representing must already be a well-known and searched figure to be considered for verification.
Facebook is really strict when it comes to verifying account.
It has even mentioned that if you attempt to provide false information and get a badge through any unfair means, they may even delete your page/account permanently.
So keep that in mind.
Tips on Maximizing Probability of having your pages merged
Like we mentioned, there can be many times when Facebook rejects to merge your Pages after your request.
But the good news is that you can make changes before you send a request for merger that can increase the probability of you having your Facebook Pages merged.
- Change the name of the pages close to same (the more similar names, the higher probability)
- Make sure that both the pages have the same contact details (business phone numbers, email addresses, etc)
- Make that the pages have similar keywords in the About section (this helps Facebook’s algorithm detect similarity between your pages)
Thank you for reading this guide. If you have any further queries, please feel free to leave a comment down below.